测试使用 MinGW-64 编译的OpenCV 是否正常,用 Qt 打开视频显示在 label。
当参见上文完成编译与安装后 ,你可以在 build/bin 下面看到各种动态库 ,本文的目的就是使用 Qt 来测试一下啊 OpenCV。
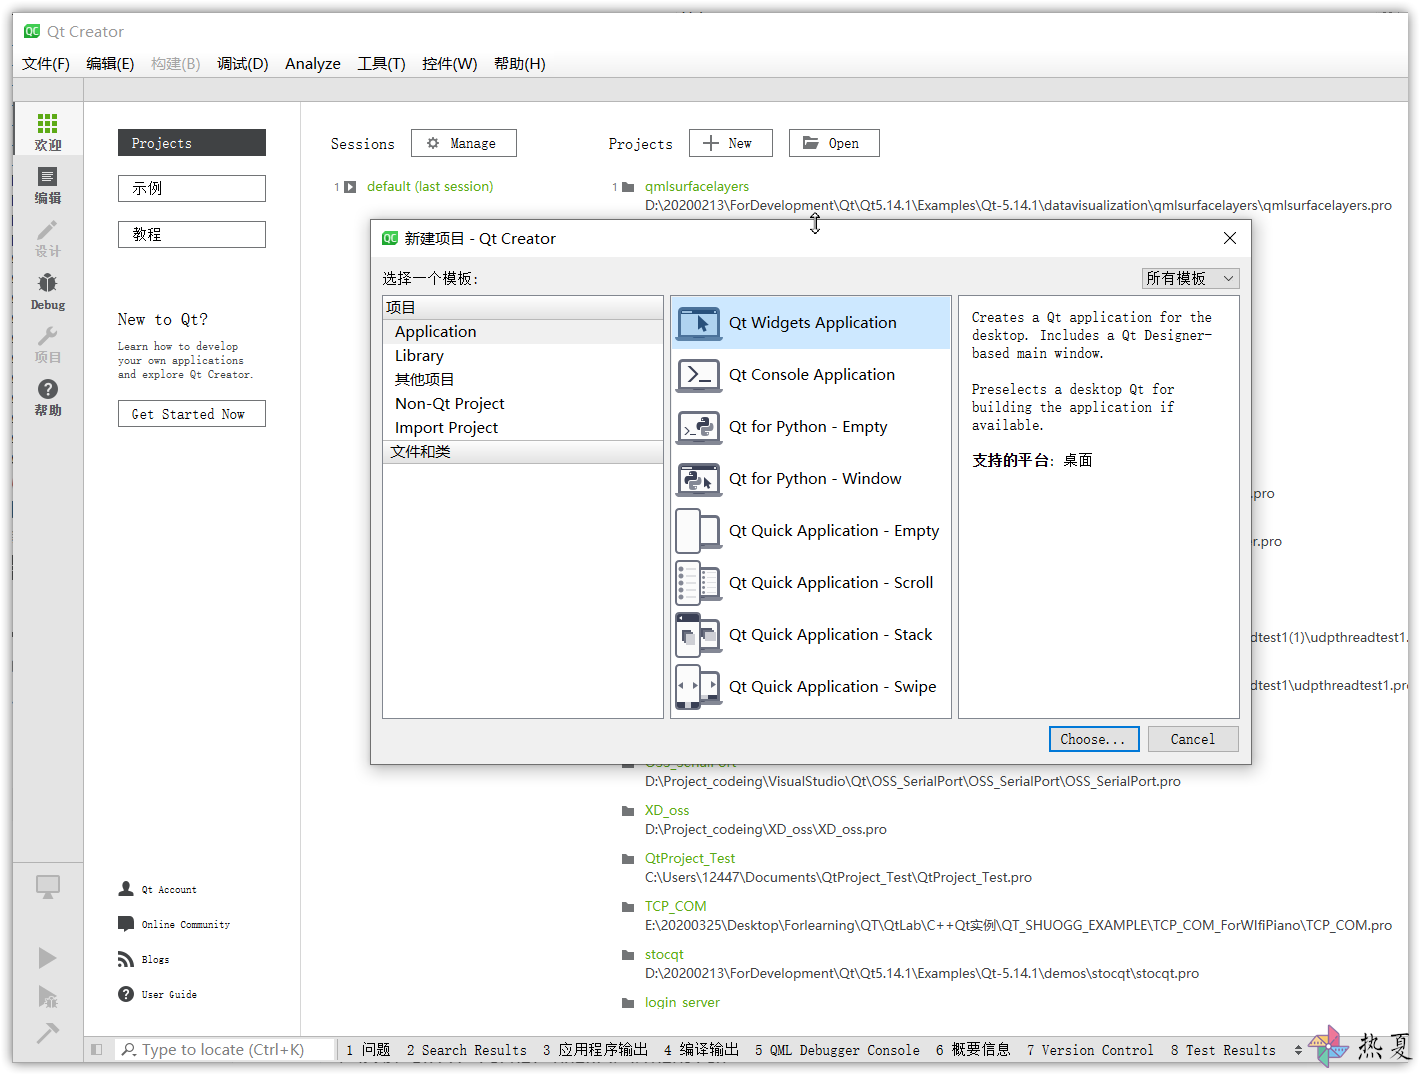
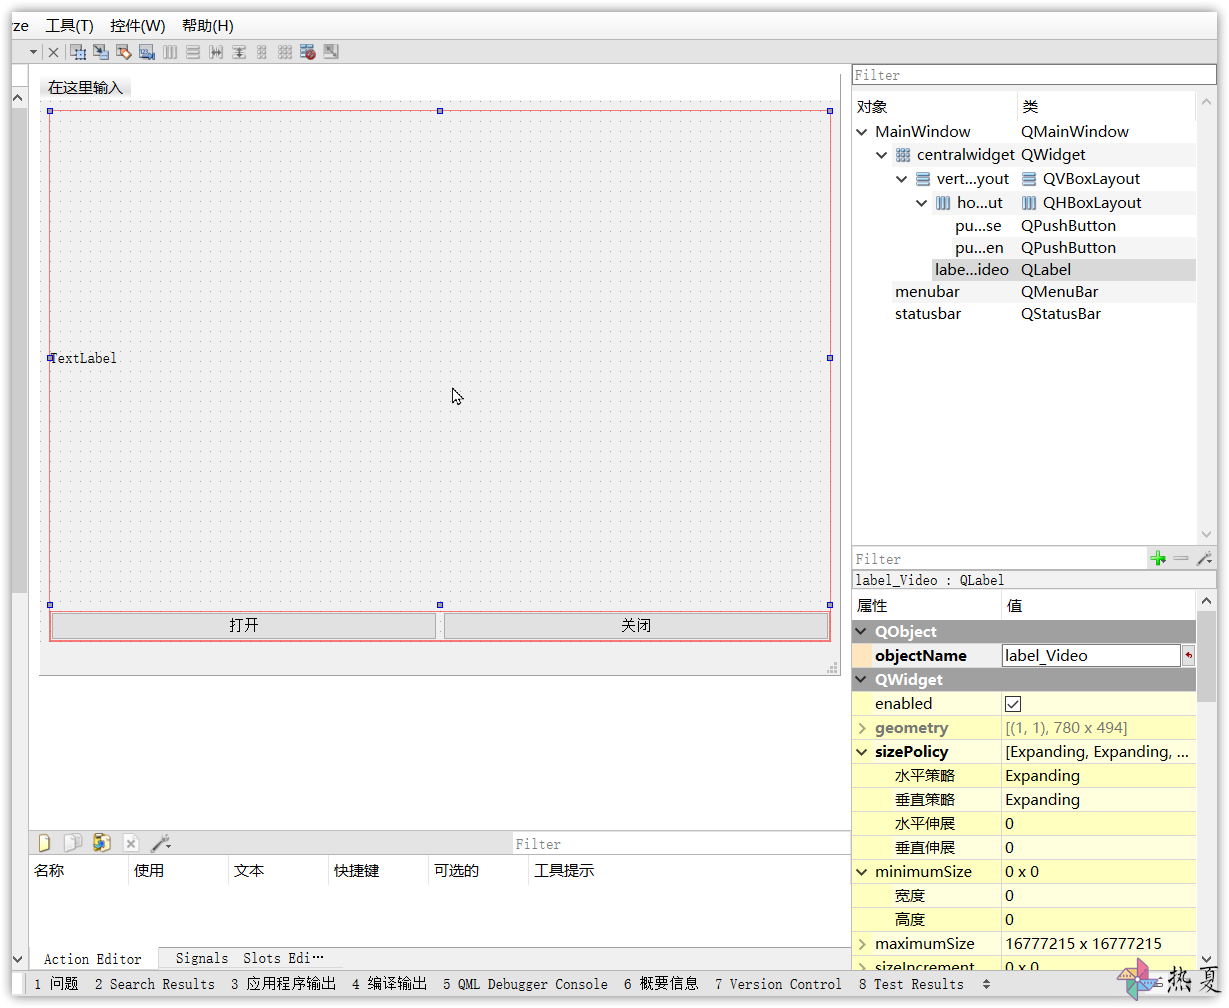
新建项目 打开Qt,新建一个Qt Widgets Application项目,添加1个label控件和2个pushButton按钮,修改pushButton按钮的名字为“开始”和“停止”,控件对象名改为 label_Video 、pushButton_Open 、 pushButton_Close
其它默认,勾选上 MinGW 64
接下来要添加“信号槽 ”,分别选中两个push button,右键选择**转到槽…**,然后选择clicked(),会自动创建信号与槽及其连接。当然也可以选择手动添加槽函数,并用 connect 连接。
配置环境变量 为 E:\20200325\DevelopmentEnvironment\opencv3411\build\install\x64\mingw\bin 配置环境变量,记得重启一下。( 我记得我以前配其它的不重启也行啊 ,但这个我的不重启不生效)
只要打开系统属性窗口并在“PATH”中添加一个新的对象元素就可以了。它们通常是用“;”隔开的,因此请在“;”后添加一个新项。注意,这个路径只与Windows操作系统相关,并且可以在这里找到OpenCV的DLL文件,以便使构建过程更加容易。Linux和macOS用户不需要对此做任何事情。
代码书写 参考 Qt5:opencv摄像头播放视频 或者 OpenCV 自带的例子 。
其中 OpenCV 下的 例子的代码如下,是在 C++ MSVC 下的代码。参考其处理流程即可。
1 2 3 4 5 6 7 8 9 10 11 12 13 14 15 16 17 18 19 20 21 22 23 24 25 26 27 28 29 30 31 32 33 34 35 36 37 38 39 40 41 42 43 44 45 46 47 48 49 50 51 52 53 54 55 56 57 58 59 60 61 62 63 64 65 66 67 68 69 70 71 72 73 74 75 76 77 #include <opencv2/core.hpp> #include <opencv2/videoio.hpp> #include <opencv2/highgui.hpp> #include <opencv2/imgproc.hpp> #include <iostream> using namespace cv;using std::cout; using std::cerr; using std::endl;int main (int , char **) Mat frame; cout << "Opening camera..." << endl; VideoCapture capture (0 ) ; if (!capture.isOpened ()) { cerr << "ERROR: Can't initialize camera capture" << endl; return 1 ; } cout << "Frame width: " << capture.get (CAP_PROP_FRAME_WIDTH) << endl; cout << " height: " << capture.get (CAP_PROP_FRAME_HEIGHT) << endl; cout << "Capturing FPS: " << capture.get (CAP_PROP_FPS) << endl; cout << endl << "Press 'ESC' to quit, 'space' to toggle frame processing" << endl; cout << endl << "Start grabbing..." << endl; size_t nFrames = 0 ; bool enableProcessing = false ; int64 t0 = cv::getTickCount (); int64 processingTime = 0 ; for (;;) { capture >> frame; if (frame.empty ()) { cerr << "ERROR: Can't grab camera frame." << endl; break ; } nFrames++; if (nFrames % 10 == 0 ) { const int N = 10 ; int64 t1 = cv::getTickCount (); cout << "Frames captured: " << cv::format("%5lld" , (long long int )nFrames) << " Average FPS: " << cv::format("%9.1f" , (double )getTickFrequency () * N / (t1 - t0)) << " Average time per frame: " << cv::format("%9.2f ms" , (double )(t1 - t0) * 1000.0f / (N * getTickFrequency ())) << " Average processing time: " << cv::format("%9.2f ms" , (double )(processingTime) * 1000.0f / (N * getTickFrequency ())) << std::endl; t0 = t1; processingTime = 0 ; } if (!enableProcessing) { imshow ("Frame" , frame); } else { int64 tp0 = cv::getTickCount (); Mat processed; cv::Canny (frame, processed, 400 , 1000 , 5 ); processingTime += cv::getTickCount () - tp0; imshow ("Frame" , processed); } int key = waitKey (1 ); if (key == 27 ) break ; if (key == 32 ) { enableProcessing = !enableProcessing; cout << "Enable frame processing ('space' key): " << enableProcessing << endl; } } std::cout << "Number of captured frames: " << nFrames << endl; return nFrames > 0 ? 0 : 1 ; }
我的 Qt 项目中完整的代码为:
QtOpenCVTest.pro
1
2
3
4
5
6
7
8
9
10
11
12
13
14
15
16
17
18
19
20
21
22
23
24
25
26
27
28
29
30
31
32
33
34
35
36
37
QT += core gui greaterThan (QT_MAJOR_VERSION, 4 ): QT += widgetsCONFIG += c++11 # The following define makes your compiler emit warnings if you use # any Qt feature that has been marked deprecated (the exact warnings # depend on your compiler). Please consult the documentation of the # deprecated API in order to know how to port your code away from it. DEFINES += QT_DEPRECATED_WARNINGS # You can also make your code fail to compile if it uses deprecated APIs. # In order to do so, uncomment the following line. # You can also select to disable deprecated APIs only up to a certain version of Qt. #DEFINES += QT_DISABLE_DEPRECATED_BEFORE=0x060000 # disables all the APIs deprecated before Qt 6.0.0 SOURCES += \ main.cpp \ mainwindow.cpp HEADERS += \ mainwindow.h FORMS += \ mainwindow.ui # Default rules for deployment. qnx: target.path = /tmp/$${TARGET}/bin else : unix:!android: target.path = /opt/$${TARGET}/bin!isEmpty (target.path): INSTALLS += target INCLUDEPATH += E:\20200325 \DevelopmentEnvironment\opencv3411\build\install\include LIBS += E:\20200325 \DevelopmentEnvironment\opencv3411\build\install\x64\mingw\bin\libopencv_*.dll
注意,在上面的代码中,需要替换自己的路径。
mainwindow.h
1 2 3 4 5 6 7 8 9 10 11 12 13 14 15 16 17 18 19 20 21 22 23 24 25 26 27 28 29 30 31 32 33 34 35 36 #ifndef MAINWINDOW_H #define MAINWINDOW_H #include <QMainWindow> #include "opencv2/opencv.hpp" #include "QTimer" #include "QImage" QT_BEGIN_NAMESPACE namespace Ui { class MainWindow ; }QT_END_NAMESPACE using namespace cv;class MainWindow : public QMainWindow{ Q_OBJECT public : MainWindow (QWidget *parent = nullptr ); ~MainWindow (); private slots: void on_pushButton_Open_clicked () void on_pushButton_Close_clicked () void ReadCarmeraFrame () private : Ui::MainWindow *ui; cv::VideoCapture capture; QTimer *timer; Mat frame; }; #endif
mainwindow.cpp
1 2 3 4 5 6 7 8 9 10 11 12 13 14 15 16 17 18 19 20 21 22 23 24 25 26 27 28 29 30 31 32 33 34 35 36 37 38 39 40 41 42 43 44 45 46 47 48 49 50 51 52 53 54 55 56 57 #include "mainwindow.h" #include "ui_mainwindow.h" #include "QDebug" MainWindow::MainWindow (QWidget *parent) : QMainWindow (parent) , ui (new Ui::MainWindow) { ui->setupUi (this ); setWindowTitle (" 测试 OpenCV 打开 摄像头" ); timer=new QTimer (this ); connect (timer,&QTimer::timeout,this ,& MainWindow::ReadCarmeraFrame); connect (ui->pushButton_Open, &QPushButton::clicked , this , &MainWindow::on_pushButton_Open_clicked ); connect (ui->pushButton_Close, &QPushButton::clicked, this , &MainWindow::on_pushButton_Close_clicked); } MainWindow::~MainWindow () { delete ui; } void MainWindow::ReadCarmeraFrame () capture>>frame; QImage image = QImage ((const uchar*)frame.data,frame.cols,frame.rows,QImage::Format_RGB888).rgbSwapped (); ui->label_Video->setPixmap (QPixmap::fromImage (image)); } void MainWindow::on_pushButton_Open_clicked () capture.open (0 ); if (!capture.isOpened ()) { qDebug () << "ERROR: Can't initialize camera capture" << endl; } qDebug () << "Frame width: " << capture.get (CAP_PROP_FRAME_WIDTH) << endl; qDebug () << " height: " << capture.get (CAP_PROP_FRAME_HEIGHT) << endl; qDebug () << "Capturing FPS: " << capture.get (CAP_PROP_FPS) << endl; timer->start (25 ); } void MainWindow::on_pushButton_Close_clicked () timer->stop (); capture.release (); }
mainwindow.ui 的 xml 为:
1
2
3
4
5
6
7
8
9
10
11
12
13
14
15
16
17
18
19
20
21
22
23
24
25
26
27
28
29
30
31
32
33
34
35
36
37
38
39
40
41
42
43
44
45
46
47
48
49
50
51
52
53
54
55
56
57
58
59
60
61
62
63
64
65
66
67
68
69
70
71
72
73
74
75
76
77
78
79
80
81
82
<?xml version="1.0" encoding="UTF-8" ?> <ui version ="4.0" > <class > MainWindow</class > <widget class ="QMainWindow" name ="MainWindow" > <property name ="geometry" > <rect > <x > 0</x > <y > 0</y > <width > 995</width > <height > 709</height > </rect > </property > <property name ="sizePolicy" > <sizepolicy hsizetype ="Expanding" vsizetype ="Expanding" > <horstretch > 0</horstretch > <verstretch > 0</verstretch > </sizepolicy > </property > <property name ="minimumSize" > <size > <width > 800</width > <height > 550</height > </size > </property > <property name ="windowTitle" > <string > MainWindow</string > </property > <widget class ="QWidget" name ="centralwidget" > <layout class ="QGridLayout" name ="gridLayout" > <item row ="0" column ="0" > <layout class ="QVBoxLayout" name ="verticalLayout" > <item > <widget class ="QLabel" name ="label_Video" > <property name ="sizePolicy" > <sizepolicy hsizetype ="Expanding" vsizetype ="Expanding" > <horstretch > 0</horstretch > <verstretch > 0</verstretch > </sizepolicy > </property > <property name ="text" > <string > TextLabel</string > </property > </widget > </item > <item > <layout class ="QHBoxLayout" name ="horizontalLayout" > <item > <widget class ="QPushButton" name ="pushButton_Open" > <property name ="text" > <string > 打开</string > </property > </widget > </item > <item > <widget class ="QPushButton" name ="pushButton_Close" > <property name ="text" > <string > 关闭</string > </property > </widget > </item > </layout > </item > </layout > </item > </layout > </widget > <widget class ="QMenuBar" name ="menubar" > <property name ="geometry" > <rect > <x > 0</x > <y > 0</y > <width > 995</width > <height > 26</height > </rect > </property > </widget > <widget class ="QStatusBar" name ="statusbar" /> </widget > <resources /> <connections /> </ui >
运行
crashed 问题解决
问题:用qt creator写程序,运行发生crashed,一般是在程序中使用了第三方库,运行时找不到dll,在qt creator中运行会直接crashed,不提示原因。
解决办法:直接运行生成的exe文件,会提示缺少xxxdll,此时,直接将缺少的dll放到exe所在文件夹中,再次运行,成功。也可以将dll添加到系统路径中。总之,让程序找到调用的第三方库,就不会creashed了。https://blog.csdn.net/Joker_mw/article/details/79351076
解决方法有两个:
的动态库 dll 文件拷贝到运行的 exe 目录中
参考文献 Qt5:opencv摄像头播放视频
cv::VideoCapture Class Reference